Building an Overlay/Stepped Axle
NOTE - Building your own axles should only be undertaken by a skilled and proficient welder. Good weld penetration with no porosity or undercut is required to ensure the strength and integrity of the axle is not compromised. If you have any doubts about your skills, leave axle building to the professionals, poorly built and poorly welded axles can cause accidents and kill people.
Axles for offroad or extreme use trailers should always be professionally manufactured and ideally be of solid construction.
Building an Overlay/Stepped Axle
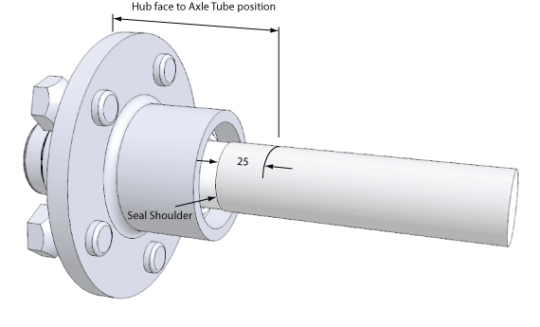
Building an overlay axle is relatively straight forward. Axle tube length is the same as required for straight beam axles, with the ends of the tube approximately 25mm back from the rear seal shoulder on the stub axle 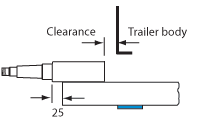
The stub axle will need to be cut to suit the width of the chassis allowing clearance between the end of stub axle and the trailer side/chassis.
The simplest method of setting up the axles to ensure they are straight and true is to dry fit the hubs to the stub axles using a cheap set bearings (discard after use or keep them as emergency spares), and then fit the trailer rims to the hubs.
Get a nice straight length of “U” or "C" Channel which is longer than the total width of the completed trailer.
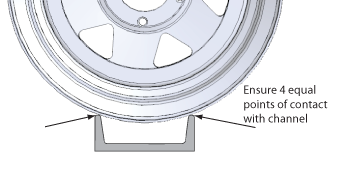
Sit the rims onto the channel so that the rim sits on the edges of the channel with full, four point contact. The wider the channel, the more accurate the contact will be (as long as the rim doesn’t touch the inner face of the channel).
Adjust the rims so that the axle tube sits accurately between the 25mm marks on the stub axles. Secure and stabilise the rims in position with sandbags.
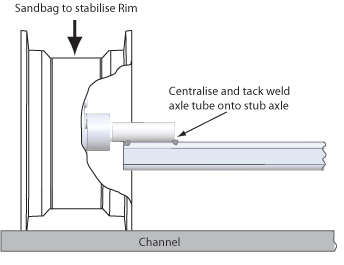
 Clamp the stub axle to the axle tube (weld a small piece of angle iron onto the fixed end of a G clamp to help secure the stub axle if required). Double check that the stub axle is central to the axle tube by laying a rule against each side of the axle tube and measuring from the rule to the stub axle. Adjust until the axle is central on both ends and tack weld into position.
Unclamp, and slowly spin the axle 360 degrees. The axle should spin freely without any movement or wobble from the rims. If any rim movement is noticed or there is any tightness when turning the stub axle, there may be some misalignment. Double check your measurements, break the tack welds and adjust as required.
Once all is ready for welding, unbolt the rims and remove the hubs from the axle.
Turn up the welder and fully weld the stub axle to the axle tube using a good root run and large capping fillet weld.
Because the stub axle has a larger mass that will absorb the heat slower than the axle tube, more electrode/wire time needs to be spent on the stub axle to ensure good penetration. A nice slow weave for the capping run is recommended.
A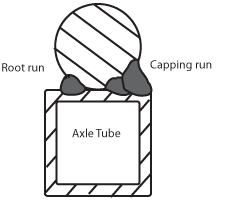
Never run the welder earth through the hubs/bearings or on the stub axle. Always clamp the earth lead directly onto the axle tube - weld on a temporary lug if required.
Once welded, let the axle cool down slowly, do not quench or spray with water. The crystalline structure of the steel can be adversely affected by rapid cooling leading to potential weakening of the axle.
Once cool, double check position of the spring centre holes, drill or weld spring plates as required.
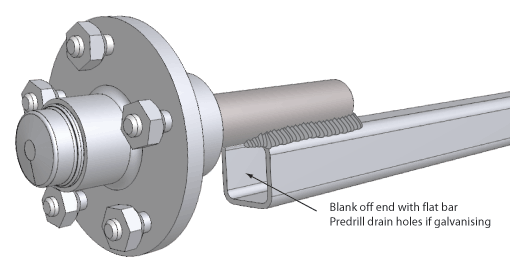
Cut a square of flat bar and blank off the end of the axle tube before painting. If galvanising the axle, predrill drain holes in the flat bar.