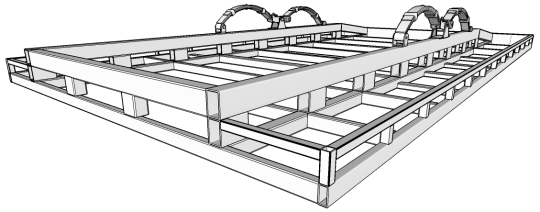
3.6 X 2.0m Flatdeck Trailer
Tie Rails
Fitting the Tie Rails
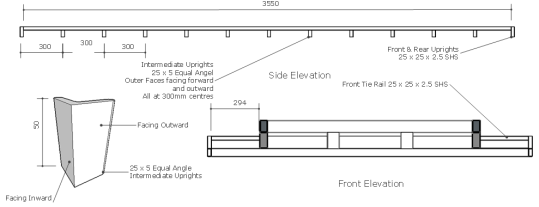
Measure and mark out along the outer chassis rails, 300mm centres starting 12.5mm in from the front of the trailer to compensate for the first upright.
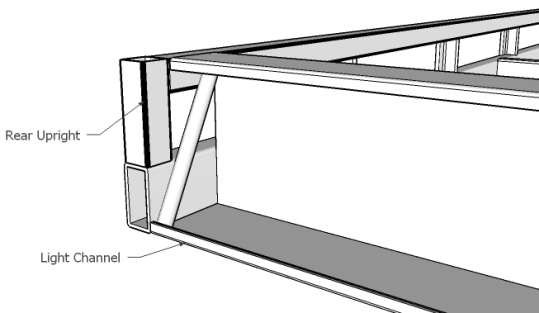
Fit the end 25 x 25 SHS uprights and tack weld into position.
Position the 25mm angle uprights at the marked positions with the outer face flush with the outside edge of the chassis rail and the other facing towards the front of the trailer. Tack weld onto the chassis rail.
Lay the tie rail between the end uprights and tack weld into position. Adjust the tie rail or the intermediate uprights to ensure a nice straight and level tie rail.
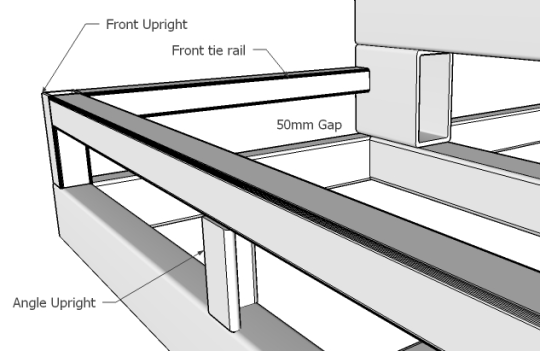
Fit the front tie rails between the front upright and the front chassis packer. Make sure the tie rail is level and flush with the front of the trailer and tack weld into position.
Once everything is tack welded into position, check that everything is square and looking as it should.
Fully weld up all visible components. The underside of the top chassis (the true top surface) can be done once the drawbar has been fitted and the chassis flipped over.