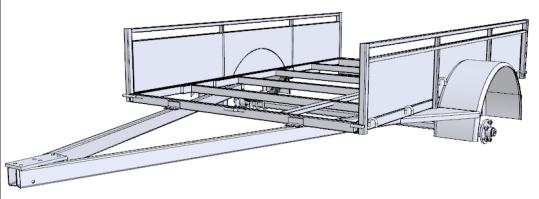
8' x 5' Single Axle Trailer
Guards
GUARDS
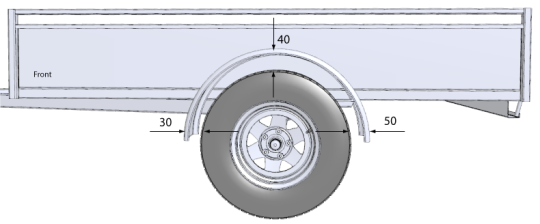
To find the correct position of the mudguard, fit the axle to the springs loosely, dry assemble the bearings and hubs and fit the wheels to the hubs.
Place an offcut of timber or steel around 40-50mm thick on top of the tyre and lower the guard onto this. Stand back and check the clearance around the front and rear. The guard can be pulled open if needed to allow for a better fit. Whatever measurement you pulled the guard out to, make sure that the other guard matches.
The guard needs to have roughly equal clearance at the front, top and rear, but pays to give a little extra at the top and rear to compensate for spring movement. A good rule of thumb is 30mm clearance at the front, 40mm at the top and 50mm at the rear, or of similar ratios.
Once the guard is in the correct position, tack weld the guard in position (another set of hands is recommended. Make sure that the guard is in full contact with the panel side and then stand back and make sure that the guard is in the correct position.
If the guard doesn't look quit right, now is the time to adjust it.

Mark out 50mm from both front and rear of guard at the base of the chassis rail, and using a large square, mark up the panel to the top lip, measure 25mm away from the guard and mark on the lip.
Using a grinder with a cutting blade, notch out the top lip back to the main panel to fit the centre uprights.
Position uprights square with the chassis rail and tack weld into position.
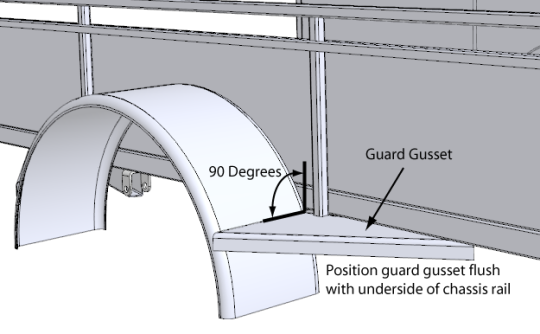
GUARD GUSSETS
Guard gussets provide a couple of necessary functions, firstly to give the guard strength and support especially as the guards are normally the first things to get knocked around. Secondly they function as a step onto and into the trailer. Be wary of using a piece of rod or pipe to brace the guard, slip on this, when you are climbing into the trailer, you are likely to break your leg if you fall between the brace and the trailer.

When fabricating the gussets, ensure you make 2 pieces as per the drawing and 2 pieces with the lip folded the opposite direction. The drainage cut out is to help prevent debris and water settling causing corrosion.
When fitting, make sure the gusset is square with the side and flush with the underside of the chassis rail. This is another job where a spare pair of hands is useful. An out of square gusset is very noticeable so take care getting it right.
Once everything is tack welded in position and looking right, stitch weld along the outside of the trailer along where the panel and chassis rail meet. A 50mm stitch weld with a 100mm gap is perfect. It is not necessary to weld the panel on the inside of the trailer.
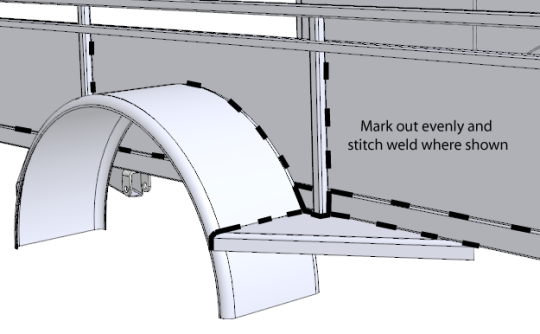
Stitch weld both sides of the centre uprights, around the topside of the guards and gussets and fully weld all visible joins around the top portion of the centre uprights.
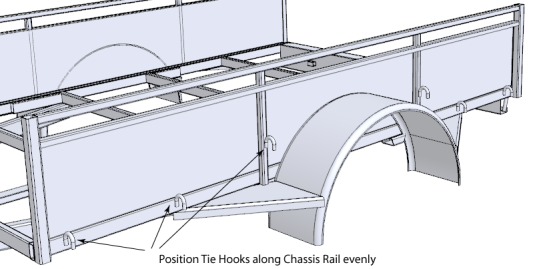
TIE HOOKS
You can fit as many tie hooks to your trailer as you like and some say the more the merrier. Practically you only require four to six tie hooks on each side, and as long as they are strong and can accommodate good sized rope, there is little else you need.
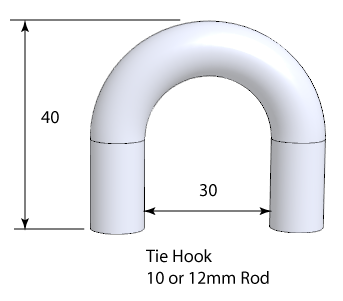
Tie hooks can be made by rolling a piece of rod around a former in a vice and cutting to size. The easiest tie hooks are made from chopping off the end of chain links.
To prevent your rope chaffing, make sure all surfaces and edges of the tie hooks are smooth.
Weld the tie hooks with good strong welds to the chassis rail and the centre uprights.
Next we get to build and fit the tailgates - click TAILGATES below