6' x 4' Single Axle Trailer
Chassis

Chassis Setup
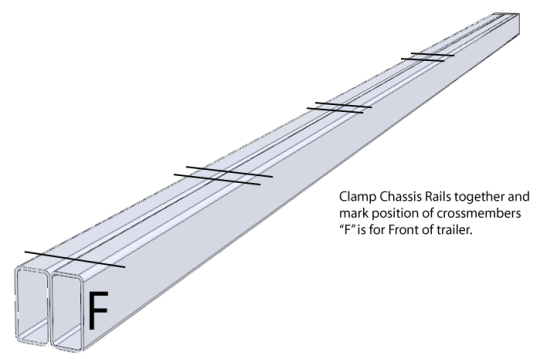
Lay your chassis rails with the widest sides together and clamp. Mark one end of the chassis rails with 'F' for front of trailer and use this as your point for your measurements.
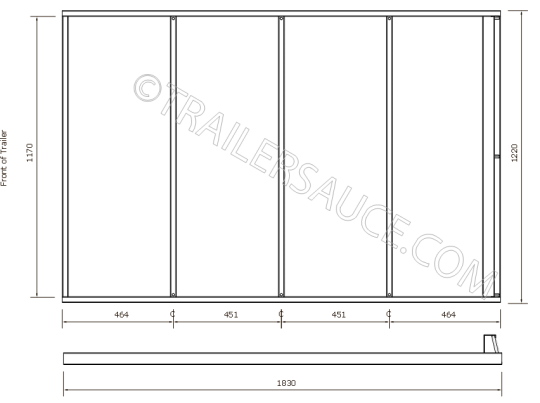
Divide the length of the chassis rails so that the cross members will be at equal centres. Mark the chassis rails with the required measurement and a second mark 25mm further on. This marks the front and back position for the cross members. Using a square mark across both the chassis rails and unclamp.
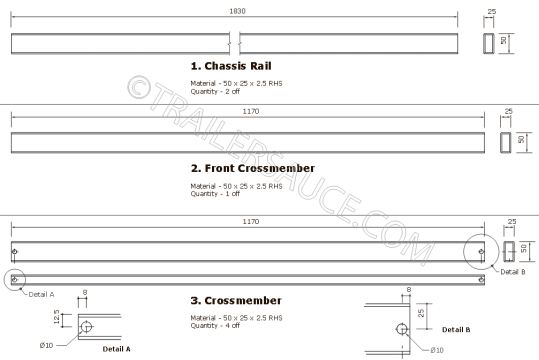
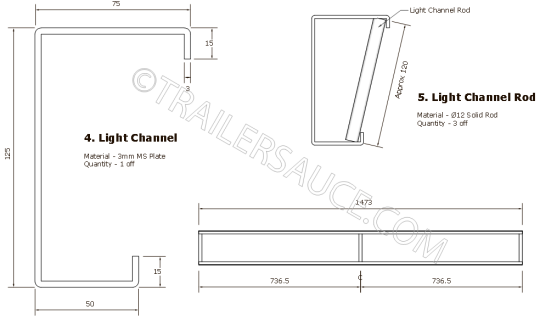
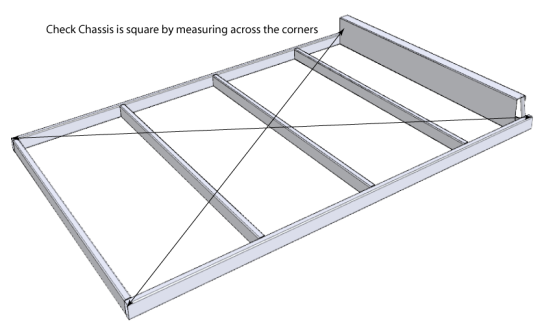
On a flat surface or trestles lay the chassis rails parallel with each other and lay the cross members and the light channel (see detail shown below in finished position - flip upside down when setting up the chassis as below) in the correct position and as square as reasonably possible
Tack weld all the components together with one or two welds and measure across the trailer frame diagonally for squareness. Both measurements need to be taken from the same point of the chassis as each other and the frame will be square once both measurements are exactly the same.
Adjusting an out of square chassis frame
Where one measurement is longer, divide the difference between the two measurements and gently knock the longest corner of the frame to match the shortest side plus the difference in measurement – for example – if the shortest reading is 3095mm and the longest is 4015, the difference between the two is 20mm. Divide this in half- 10mm then knock the longest corner so your tape reads 3095mm plus 10mm (4005mm) Re-measure and keep adjusting the frame until both measurements are exactly the same. Once the frame is square, you will need to clamp or sandbag the frame to prevent any movement while the frame is being welded.
Work your way around the frame welding all the components together. If you have welded the frame on the floor of the workshop, lay a couple of good welds on all the components and lift the frame up onto your trestles or stands, recheck the frame squareness and finish welding of the frame.