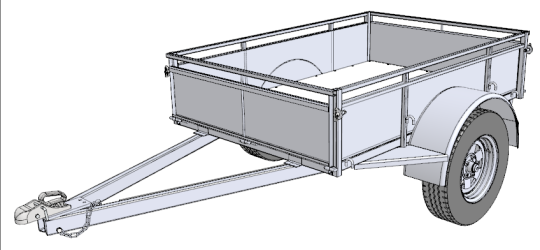
6' x 4' Single Axle Trailer
Finishing

Finishing from the Front
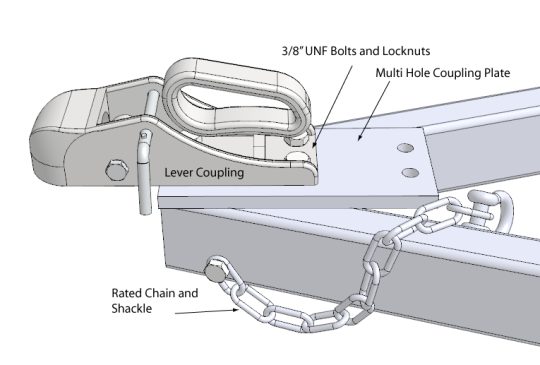
Fit your chosen coupling to the trailer using 3/8" UNF bolts and lock nuts or larger if required. It may be a bit of a squeeze getting the nuts from within the drawbar sections and a bit of grease on your spanner may help hold the nut in place while you turn the bolt.

Check that the coupling is centrally aligned before tightening up securely.
Fit the chain and shackle to the drawbar using a chain washer and high tensile bolt.
Fit a plug holder if required on the drawbar to keep the plug out of harms way while the trailer is in storage.
Fit the drop locks to the front and rear trailer uprights and bolt up securely and fit the tailgates.
Double check your spring hanger bolts and "U" bolts on the axle that they are secure and tight and the wheels to the trailer.
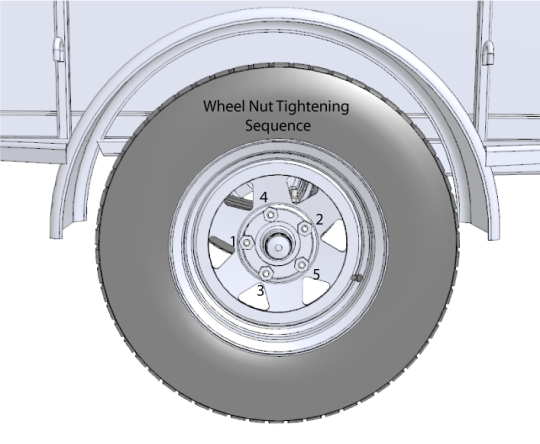
Hand tighten the stud nuts to help align the rim on the hub and tighten the nuts in sequence as below. Ideally use a torque wrench to ensure that the nuts are tightened adequately.
Torque Settings for wheel nuts are
7/16" UNF 110Nm or 80 Ftlbs
1/2" UNF 125Nm or 90 Ftlbs

Put a dab of grease on the towball and hook the trailer up to your tow vehicle and double check that all the lights are working.
Grab a new vehicle registration form from your local vehicle registration centre, fill it out and register your new trailer. Attach your new license plate to your trailer and book the trailer in for a Warrant of Fitness.
Once the trailer is warranted it is ready for loading!
After around 100kms or so, go around all the spring bolts and axle U bolts, coupling bolts and tailgate latch bolts and check all are in position and tight.
Good luck and happy trailering!