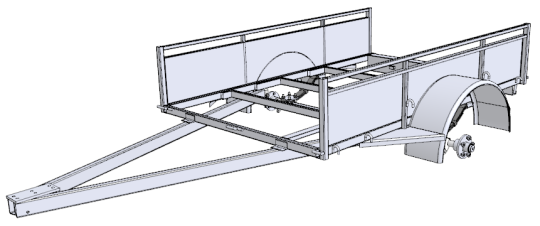
6' x 4' Single Axle Trailer
Sides

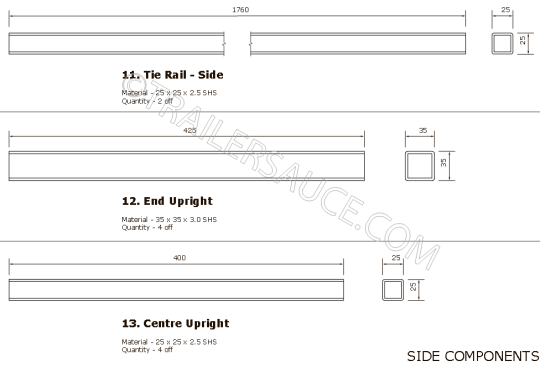
Cut the tie rails and uprights as per the drawing below.

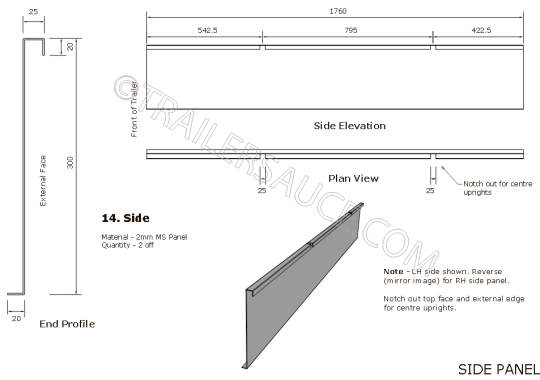
The side profile is designed to give good strength to the trailer while keeping the weight to a minimum, lighter panel may be used but there may be issues with buckling of the panel when welded.
Notch the top and outside edge to allow the uprights to fit as shown.

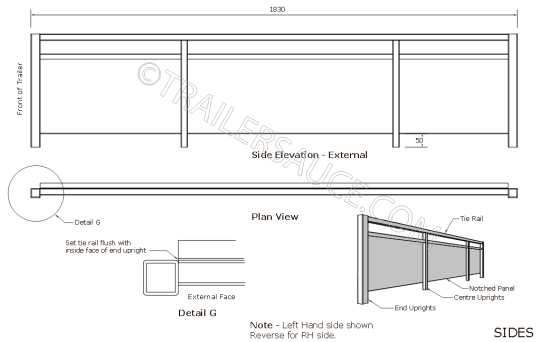
Using the chassis as a bench, set up the end uprights flush with the ends of the chassis and fit the top tie rail between them.
Tack weld the components together. Place a couple of bits of scrap steel or wood and clamp flush under the ends of the chassis to support the uprights while tacking in place. Make sure uprights are flush with the ends of the chassis and level with the underside of the chassis rails.
Check uprights are square with the chassis and clamp into position.

Fit panel into frame and adjust so that the panel is flush with the inside of the uprights and sitting on the chassis rail. Clamp the panel down onto the chassis rail and tack weld onto the uprights.
Unclamp and lay the frame and panel onto the chassis, flip over so that the side with the panel flush with the uprights is facing up, clamp to the chassis and fully weld where the panel and the end uprights meet. It is only necessary to weld the inside face with a nice light weld, to prevent blow through and buckling of the metal, but enough to join the two pieces together.
Clamp the side back into position on the chassis and clamp fully along the inside lip of the panel/chassis rail.