Trailer Lights: What You Need and How to Wire Them Right
Trailer Lighting: What You Need, What the Law Requires, and How to Wire It Right
Getting the lights right on a trailer is one of those jobs that feels simple until it isn't. Most DIY builders treat wiring as an afterthought — something to bolt on at the end once the frame is built and the deck is done. That usually leads to a trailer that works fine in the driveway and starts playing up the moment it hits the road.
Lighting is not just a legal requirement. It is how other drivers know where your trailer ends, what you are about to do, and whether they need to slow down. Getting it right matters every trip.
What Lights Does a Trailer Actually Need?
The minimum legal requirements vary by country and jurisdiction, but the core list is consistent across most of NZ, Australia, and the US. If you are building a trailer that will be registered and towed on public roads, you need:
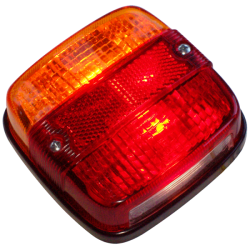
Tail lights — visible from the rear, showing that the trailer is there.
Brake lights — activate when the tow vehicle brakes. These are separate from tail lights in function even if they share the same housing.
Indicator/turn signal lights — left and right, rear. Some jurisdictions also require front-facing clearance indicators above a certain trailer width.
Reverse light — required in many jurisdictions if the trailer is above a certain GVM. Not always mandatory on small utility trailers, but worth including.
Number plate light — a small but often forgotten item. Your plate must be illuminated at night.
Side marker lights — required on trailers above a certain length (typically over 6 metres / 20 feet) and on wider trailers. Check your local rules.
Clearance lights — required on wide trailers, typically anything over 2.1 metres wide.
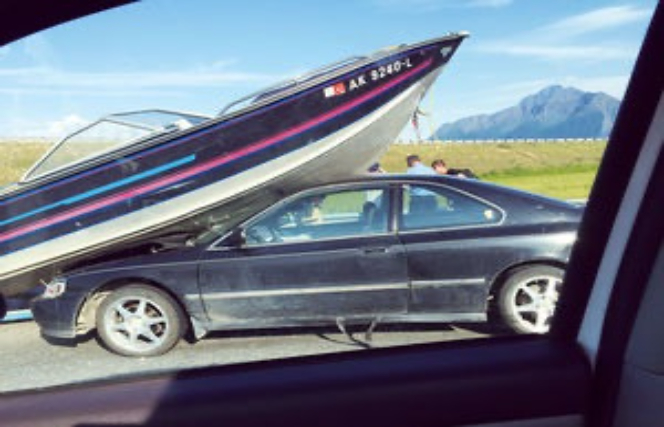
If your trailer will carry a load that extends beyond the rear of the deck, you may also need an additional light board or a red flag during daylight.
LED Versus Incandescent: Which to Use
The short answer: use LED.
Incandescent lights are cheaper to buy and have been used on trailers for decades. They work fine in controlled conditions. But they fail more often, use more power, generate more heat, and are significantly less visible in daylight or bad weather compared to a quality LED equivalent.
LED trailer lights are brighter, last longer, draw far less current from your vehicle's electrical system, and handle the vibration and weather exposure that trailer lights face better than incandescent. The upfront cost difference is not large enough to justify going with globes.
One caveat with LEDs: some tow vehicles with older or analogue turn signal flasher circuits will not flash LEDs correctly, or will flash at the wrong rate, because LEDs draw so little current that the thermal flasher does not trigger. If that happens on your setup, replacing the flasher unit with an electronic one (often called a solid-state flasher) fixes it. This is a five-minute job on most vehicles.
Sealed Versus Unsealed Lights
Most trailer lights sold cheaply are not properly sealed. They look fine on the shelf and work well for a few months. Then moisture gets in, the globe corrodes, the lens fogs, and the connection oxidises.
For a trailer that will see road use — especially one that will be washed, exposed to rain, or used on a boat ramp — sealed or submersible lights are worth the extra cost. A submersible light rated to IP67 or IP68 can be briefly submerged in water without failing. If your trailer backs down a boat ramp at all, submersible lights are not optional; they are the only lights that will last.
Even for dry-use trailers, sealed lights with properly crimped and heat-shrunk connectors will outlast cheap unsealed ones by years.
Wiring: The Part Most Builders Get Wrong
The lights themselves are usually not the problem. The wiring is.
Poor wiring is the leading cause of trailer electrical failure. Common mistakes include:
- Using wire that is too thin for the run length
- Relying on chassis grounds through paint, rust, or loose bolts
- Using push-in connectors and scotch locks instead of proper crimped terminals
- Running the wiring where it can abrade on the frame, get caught in the suspension, or collect water
- Not protecting the harness from heat, UV, and physical damage
Wire Gauge
For most trailer lighting circuits, 1.5mm² or 2.0mm² automotive cable is adequate for the light circuits. Ground wires should be the same gauge or heavier than the supply wire. If you are running long harnesses or larger lights, go up a size. Too thick costs nothing in the long run. Too thin causes voltage drop, dim lights, and heat.
Grounding
This is where most trailer lighting problems come from. Grounding through the chassis works — but only if the ground connection is solid, unpainted, and corrosion-free. The best practice is to run a dedicated ground wire from each light cluster back to a central ground point on the frame, then run a single heavy ground wire from that point to the tow plug. Chassis grounding with painted steel between the bolt and the frame is an unreliable ground and will cause you problems.
If you have worked through why one light is dim, one is not working, or one is backfeeding through another circuit, a floating or high-resistance ground is usually the culprit.
Wiring Routing
The harness should be routed along the frame and secured with cable ties or conduit clips at regular intervals — typically every 300mm to 500mm. It should not hang loosely where it can catch on things, drag on the road, or wrap around suspension components. Where the harness crosses sharp edges, use a grommet. Where it goes near heat or moving parts, use conduit or braided loom.
The harness also needs a strain relief near the plug end. The coupler end of the wiring takes flexing and vibration every time the trailer moves. Without strain relief at the plug, the wires will eventually fatigue and fail at the worst possible point.
Plugs and Connectors
The tow plug on the front of the harness needs to match what your tow vehicle has. The most common types:
7-pin flat — the Australian and NZ standard for most light trailers. Handles tail, brake, indicators, reverse, and a 12V auxiliary circuit.
7-pin round — common on larger and older vehicles in Australia and NZ. Carries the same functions as the flat.
7-way RV / SAE round (US) — the North American standard for most trailers. Includes a 12V power circuit and a breakaway brake circuit.
4-pin flat (US) — the most basic connector, used on small utility trailers with no electric brakes and no accessories. Handles tail, brake, and left/right indicators only.
If you need electric brakes, your plug needs to support a brake controller output. Make sure the plug type you choose carries that pin before committing to a wiring layout.
Doing a Proper Light Test Before the Road
Before the trailer goes anywhere, test every light function:
- Tail lights on
- Left indicator
- Right indicator
- Brake lights (press the pedal or use a jumper wire on the brake pin)
- Reverse light if fitted
- Number plate light
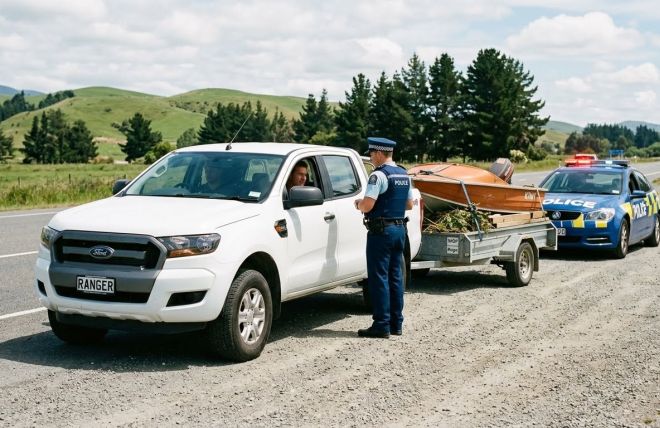
Walk around the trailer while a second person operates the controls, or use a trailer light tester plugged into the socket. Do not assume the lights work because they worked last time. A quick check before every trip takes thirty seconds and avoids a fine, an accident, or a broken-down trailer on the side of the road at night.
A Few Components Worth Spending Money On
Not everything on a trailer needs to be premium. Lights are not the place to save money.
A quality waterproof junction box mounted midway along the harness gives you a central point to splice in the wiring to each light, protects the connections from water and corrosion, and makes fault-finding much easier later.
Heat-shrink adhesive-lined terminals rather than bare crimp terminals. The adhesive liner melts and seals around the wire when heated, keeping moisture out of the crimp joint.
UV-stable conduit or corrugated loom for any harness run exposed to sunlight. Standard automotive loom degrades outdoors within a few years.
A proper wiring diagram for your specific plug type pinout, taped inside the toolbox or kept with the trailer documentation. When something stops working two years from now, knowing which pin is which makes the job fast.
Trailer lighting is not complicated, but it is not something to rush or cut corners on. Use LED lights where possible, use sealed or submersible units if the trailer gets wet, run a proper ground, protect the harness, and test everything before you tow.
The builders who have the fewest lighting problems are not the ones who spent the most money — they are the ones who took the wiring seriously from the start, used quality terminals, and routed the harness like it needed to last ten years. It usually does.
If you are building from scratch and want to get the whole project right from the frame up, take a look at the Trailer Sauce plans library for designs that are built around practical, real-world use — lights included.